For education only. Not financial advice. Past patterns do not guarantee future results. Protect capital first.
Education · SniperTrader
USME ICT Core & NoRepaint Pivots
How SniperTrader turns classic ICT ideas — liquidity, displacement, fair value gaps, order blocks —
into locked, non-repainting rules you can actually trade.
An Order Block (OB) is the last opposing candle before displacement.
When that OB breaks, it becomes a Breaker —
the old support/resistance flips role.
04
Kill Zone & Macro Filters (EST)
Asia Range / Sweep — 20:00–00:00
London Kill Zone — 02:00–05:00
NY AM Kill Zone — 08:30–11:00
NY PM Macro — 13:30–16:00
24-hour EST kill-zone strip
Asia 20–00
London 02–05
NY AM 08:30–11
NY PM 13:30–16
00:0006:0012:0018:0024:00
Asia range / sweep London KZ NY AM KZ NY PM macro
Module 01 · Liquidity & Structure
Liquidity & Structural Pivots
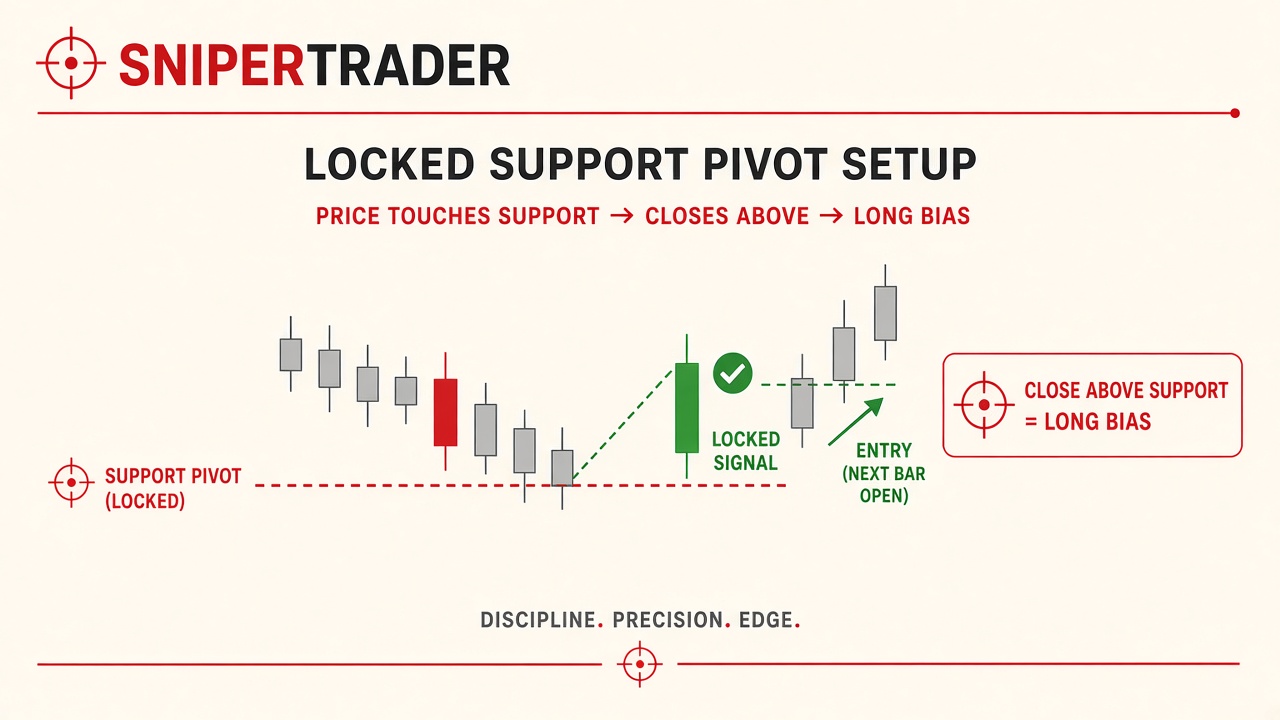
Locked NoRepaint pivots mark where stops rest. Sweeps of those pools often precede reversals.
1.1 Non-Repaint Pivot Arrows
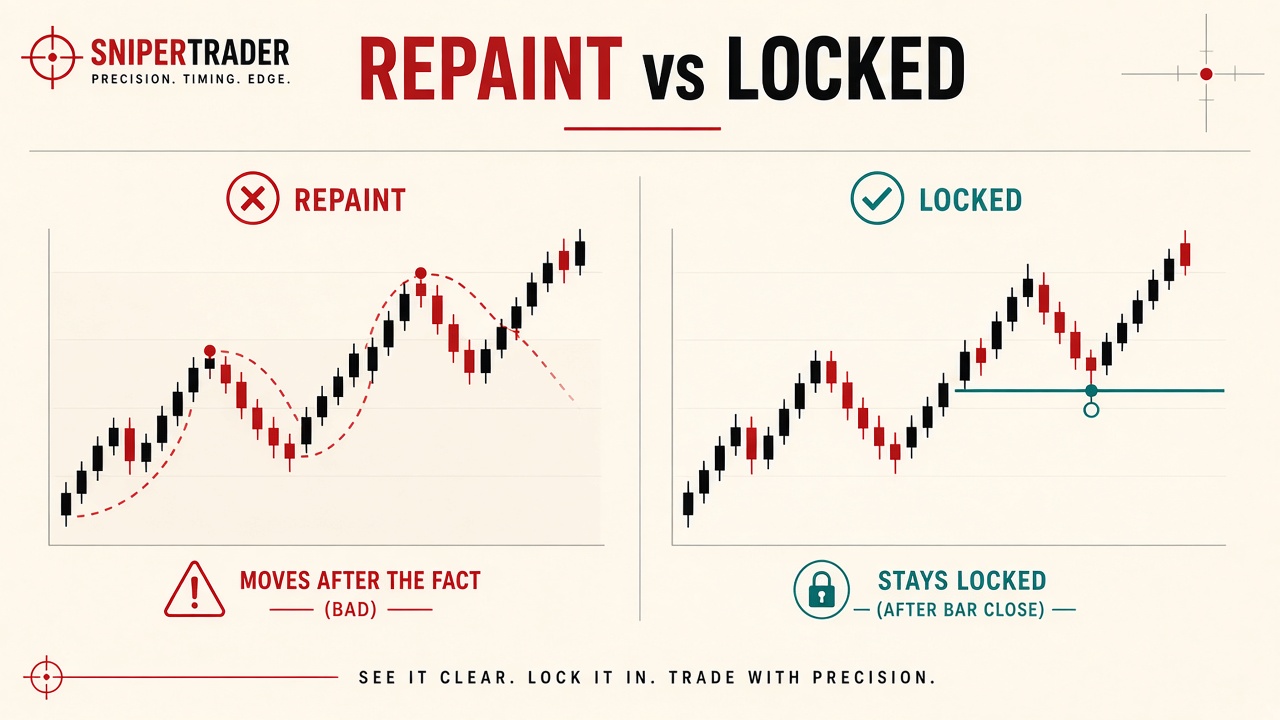
A pivot is a swing high or swing low. Traditional markers often
repaint — they move or vanish as new ticks arrive. That is a hindsight trap.
SniperTrader NoRepaint pivots use Lookback 5 / Confirm 2:
five bars of structure on the left, two closed bars on the right. Once the arrow prints
after the bar closes, it stays locked.
Lookback 5 — enough left-side bars so noise does not count as a swing.
Confirm 2 — two closed right-side bars before the pivot is accepted.
Bar-close only — no mid-candle markers.
Plain English: wait for the candle to finish. If the arrow is still there after the close, it is locked.
FIG 01 · REPAINT VS LOCKED · WAIT FOR THE BAR CLOSE
1.2 Buy-Side & Sell-Side Liquidity
Buy-Side Liquidity (BSL) = resting stop orders above prior highs
(shorts get stopped → market buys into those stops).
Sell-Side Liquidity (SSL) = resting stop orders below prior lows
(longs get stopped → market sells into those stops).
Practical rule: identify a liquidity sweep above a prior high or below a prior low
before expecting a reversal. The sweep grabs the stops; the reverse is the trade idea.
Sweep then reverse. Do not fade the first touch of liquidity — wait for the grab and the close back inside.
FIG 03 · LOCKED SUPPORT · TOUCH, CLOSE ABOVE, THEN THE NEXT BAR OPEN
Module 02 · Displacement & Gaps
Displacement & FVG Mapping
Trade fair value gaps only with the Triple-EMA Trend Cloud — never against it.
2.1 Triple-EMA Trend Cloud
The Trend Cloud is your directional filter. Green = bull. Red = bear. Grey = stand aside.
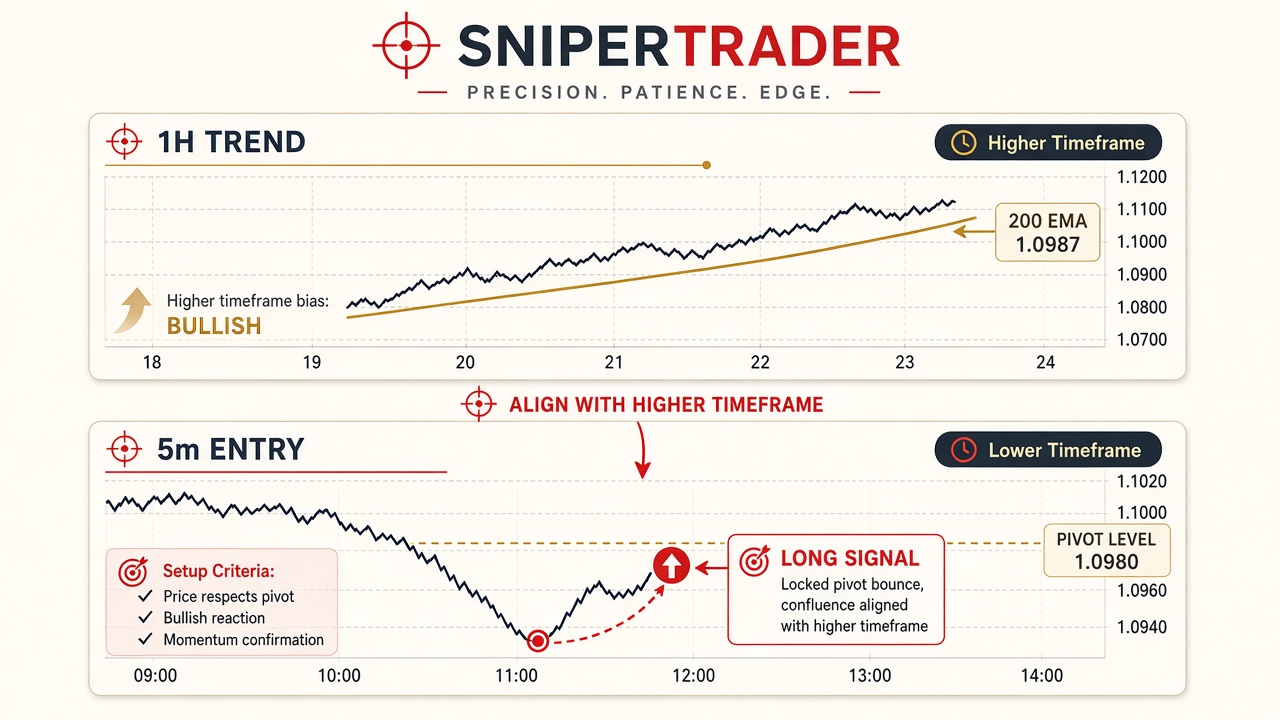
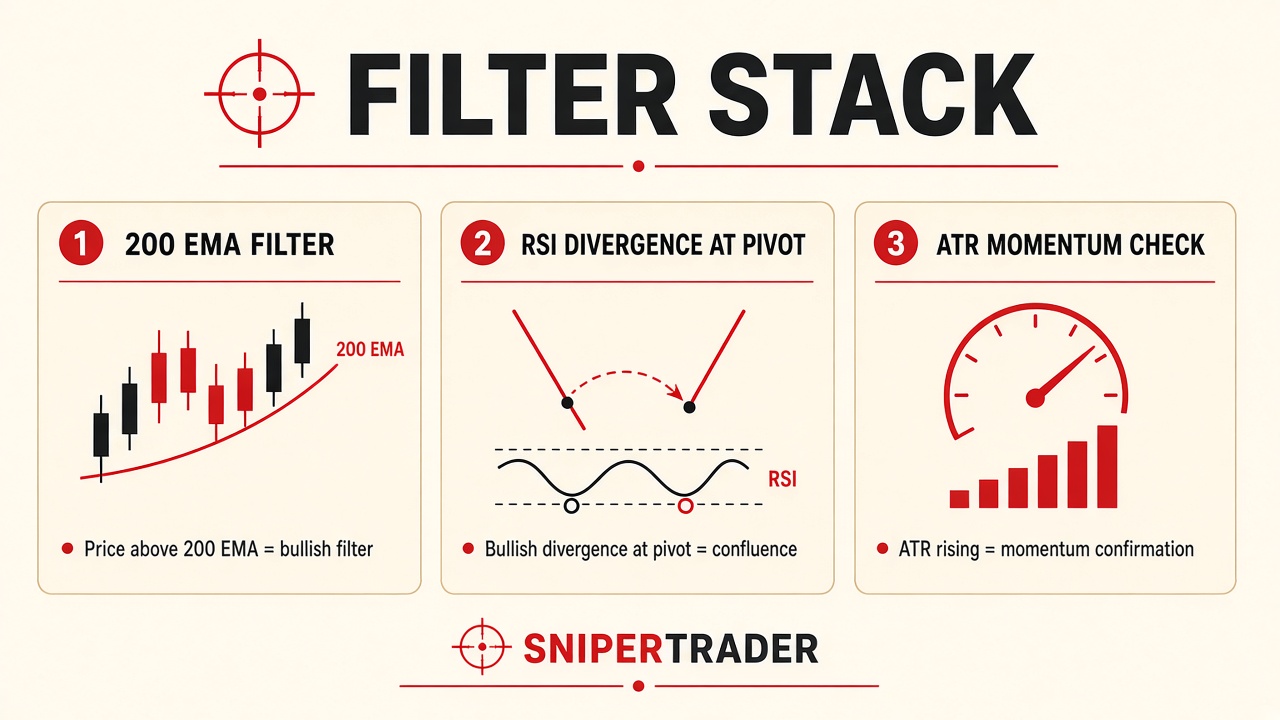
BULL (green) — EMA9 > EMA21 and Close > EMA200 → longs only.
BEAR (red) — EMA9 < EMA21 and Close < EMA200 → shorts only.
RANGE (grey) — neither → no directional edge.
Filter: long FVGs only when Trend Cloud is BULL. Short FVGs only when BEAR. Never fade the cloud.
2.2 Dynamic FVG Shading
After displacement, a 3-candle imbalance prints. Dynamic shading tracks the gap until it is
mitigated, half-filled at the 50% CE (consequent encroachment = midpoint of the FVG),
or invalidated.
Unmitigated — gap still open; valid for retest entries.
Partially filled (50% CE) — price tagged the midpoint; still usable with care.
Mitigated / Invalidated — gap closed or broken; drop it from the playbook.
FIG 05 · HIGHER-TIMEFRAME BIAS FIRST · 5-MINUTE LOCK SECOND
Module 03 · Fair Value
Institutional Fair Value
Anchored VWAP with sigma bands tells you premium vs discount — buy discount in bullish structure.
3.1 Anchored VWAP ±1σ / ±2σ / ±3σ
VWAP (Volume Weighted Average Price) is a fair-value line from your chosen anchor.
Deviation bands (±1σ, ±2σ, ±3σ) show how stretched price is from that value.
Below VWAP / −1σ — discount zone in a bullish market.
Above VWAP / +1σ — premium zone in a bearish market.
±3σ — statistical extreme; watch for exhaustion or strong continuation.
Practical: buy in discount (below VWAP / −1σ) during bullish structure. Sell in premium during bearish structure.
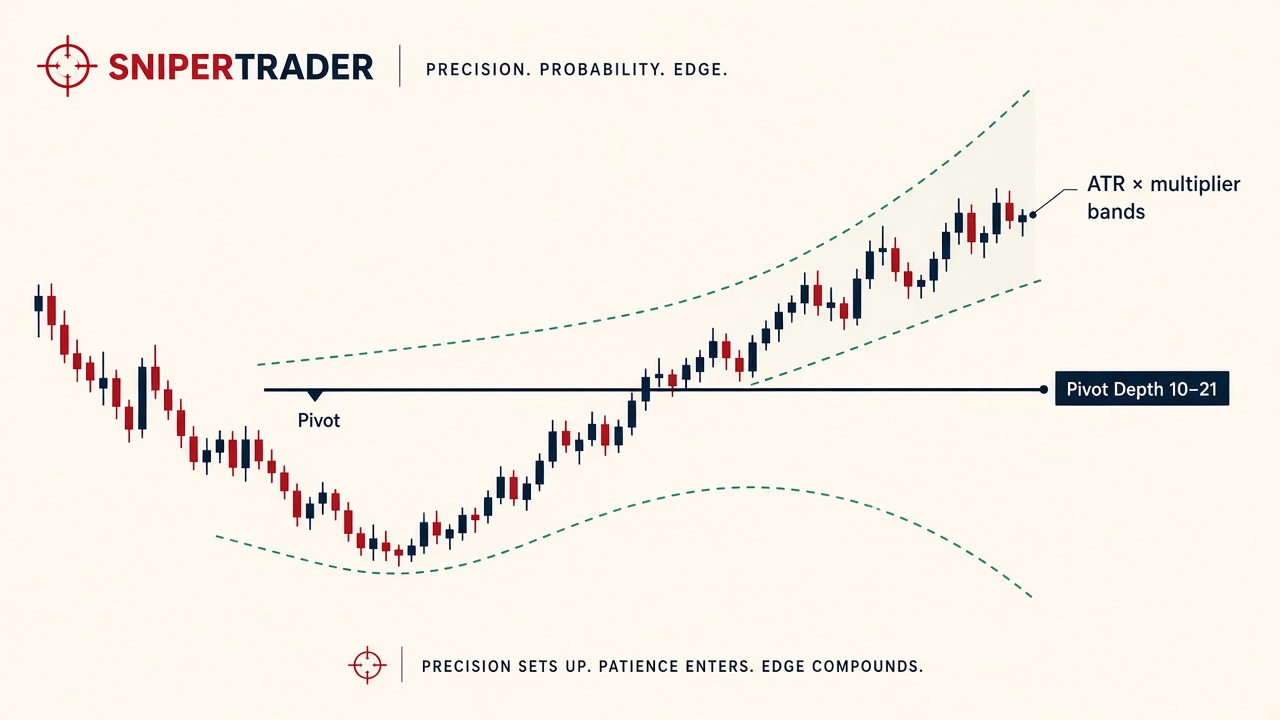
FIG 02 · VOLATILITY BANDS AROUND A LOCKED PIVOT · DEPTH 10 SCALP / 21 SWING
Module 04 · Execution
Execution & Signal Confluence
Bar-close alerts only. Structural stops and targets. Three-confluence alignment before risk.
4.1 Bar-Close Triggers & Stop/Target Matrix
Execute strictly on candle close after 3-confluence alignment.
Mid-bar wicks lie. Closed bars tell the truth.
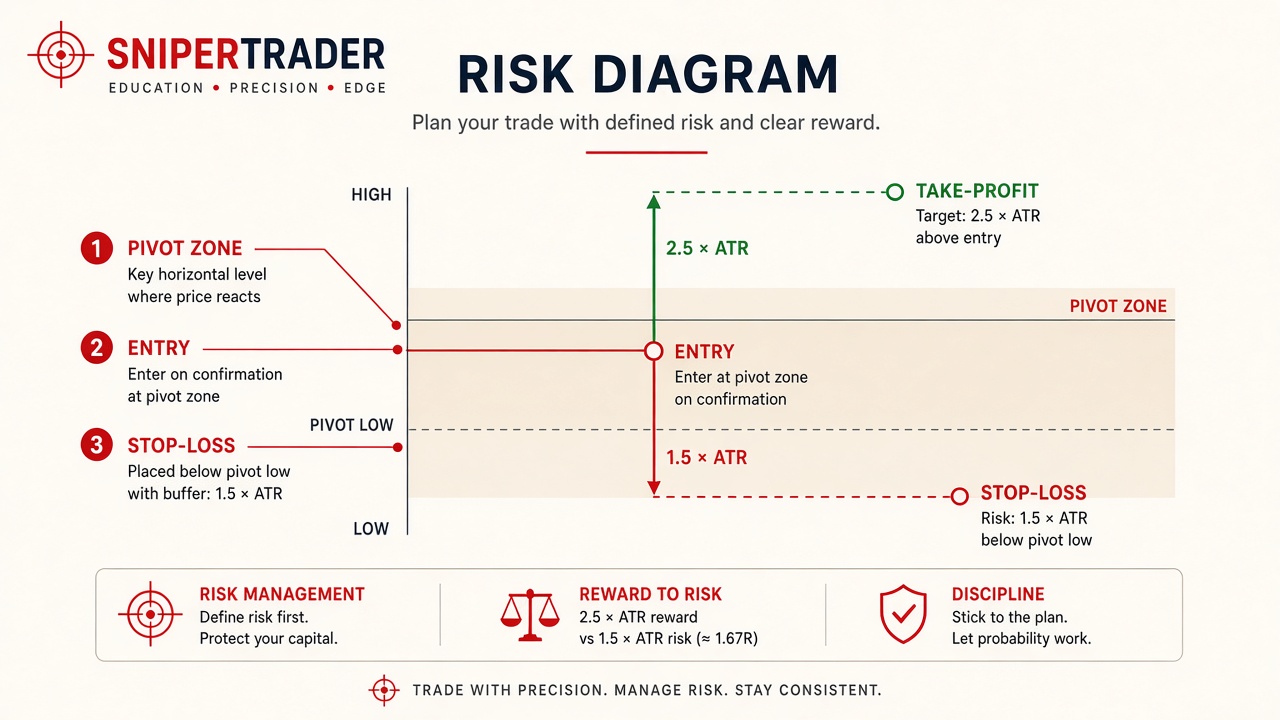
Stop matrix
Long SL → below locked pivot low
Short SL → above locked pivot high / breaker high
Buffer for noise; never widen mid-trade
Target matrix
TP1 → nearest opposing liquidity or +1σ VWAP
TP2 → deeper pool or +3σ VWAP
Trail only after TP1 if structure holds
4.2 3-Confluence Checklist
All three must agree on the closed bar before you risk capital: